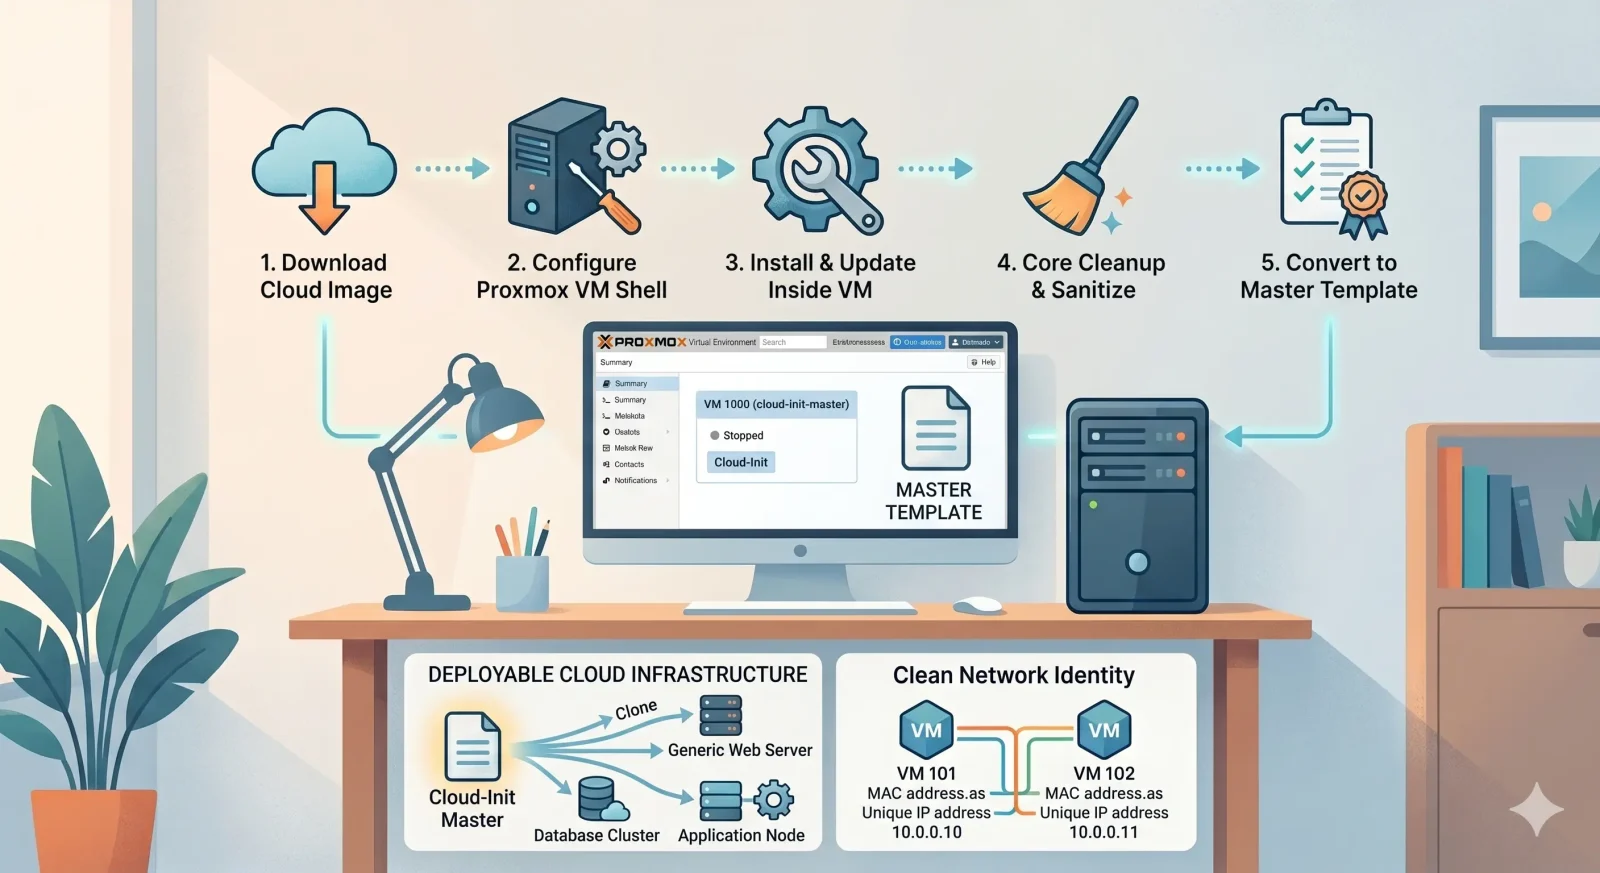
This guide covers everything from downloading the raw image to tweaking the hardware, enabling password-based SSH, fixing the dynamic hostname trick, clearing the unique machine identifiers, and sealing it.
Part 1: Downloading the Image & Preparing Proxmox
We will use the Proxmox Shell to handle the initial asset download and VM orchestration. Log into your Proxmox VE node via SSH or use the built-in Shell console.
1. Download the Latest Ubuntu 24.04 LTS Cloud Image
Navigate to your ISO/Template directory and fetch the raw cloud image from Ubuntu’s official repository:
Bash
cd /var/lib/vz/template/iso
wget https://cloud-images.ubuntu.com/noble/current/noble-server-cloudimg-amd64.img
2. Create the Base Virtual Machine Shell
We spin up a new VM shell using ID 9000. We explicitly choose the modern q35 chipset and a specialized VirtIO SCSI controller to maximize performance on modern Linux kernels.
Bash
qm create 9000 --name ubuntu-template --machine q35 --net0 virtio,bridge=vmbr0 --scsihw virtio-scsi-single
3. Import and Allocate the Disk
We attach the downloaded cloud image to your storage pool (e.g., local-zfs) and map it as a bootable SCSI drive:
Bash
qm importdisk 9000 noble-server-cloudimg-amd64.img local-zfs
qm set 9000 --scsi0 local-zfs:vm-9000-disk-0
4. Create the Cloud-Init Metadata Drive
Cloud-Init requires a virtual CD-ROM drive (ide2) containing data files that Proxmox uses to pass down configuration parameters (like credentials and networking) straight into the guest OS during its initial bootup sequence.
Bash
qm set 9000 --ide2 local-zfs:cloudinit
qm set 9000 --ciuser clouduser --cipassword yourpassword --ipconfig0 ip=dhcp
5. Hardware Optimizations & Display Metadata
These final shell adjustments tell the system how to boot, attach a virtual serial console display, and turn on the crucial Guest Agent backend.
Bash
qm set 9000 --boot c --bootdisk scsi0
qm set 9000 --serial0 socket --vga serial0
qm set 9000 --agent enabled=1
Part 2: Configuring Cloud-Init in the GUI
Before turning this machine on, log into your Proxmox Web GUI to establish your universal defaults.
- Navigate to VM 9000 -> Cloud-Init tab.
- User: Set your baseline administrator username (e.g.,
clouduser). - Password: Type your universal administrative password.
- DNS domain / DNS servers: Leave these blank! Keeping these completely empty forces Proxmox to automatically inherit whatever name you type into the “Name” box during future cloning tasks, keeping hostnames dynamic.
- IP Config (net0): Set IPv4 to DHCP.
Part 3: Inside the VM: Password SSH & Performance Tweak
Open the SSH daemon configuration:
sudo nano /etc/ssh/sshd_config
Ensure these lines exist and are uncommented:
PasswordAuthentication yes
KbdInteractiveAuthentication yes
UsePAM yes
PubkeyAuthentication yes
2. Give Your Admin Account Passwordless Sudo Power
To avoid typing your system password every single time you execute Docker commands or infrastructure tasks, let’s establish a passwordless rule.
Open the specialized sudoers configuration parser safely:
Bash
sudo visudo
Go to the very bottom line of the file and paste this rule:
Plaintext
clouduser ALL=(ALL) NOPASSWD:ALL
Save (Ctrl + O, Enter) and exit (Ctrl + X).
3. Install QEMU Guest Agent & Basic Tools
Without this step, Proxmox will never display your clone’s dynamic IP address in the summary panel.
Bash
sudo apt update && sudo apt install qemu-guest-agent docker.io docker-compose -y
sudo systemctl enable --now qemu-guest-agent
Part 4: The Core Cleansing Steps (Preventing Network Duplication)
If you turn a booted OS straight into a template right now, every clone you spawn will copy the exact same unique machine ID and MAC-leased history. This will cause your network router to assign identical IP addresses to different VMs, creating network collisions.
Run this final operational cleanup sequence inside your template terminal:
Bash
# 1. Truncate the unique system machine ID hashes
sudo truncate -s 0 /etc/machine-id
sudo rm /var/lib/dbus/machine-id
sudo ln -s /etc/machine-id /var/lib/dbus/machine-id

# 2. Scrub old DHCP network lease assignments
sudo rm -f /var/lib/dhcp/dhclient.*
sudo rm -f /var/lib/NetworkManager/*lease
sudo rm -f /var/lib/netplan/*.tmp

# 3. Purge Cloud-Init cache state to ensure fresh re-execution on clone
sudo cloud-init clean --logs --seed

# 4. Power off the host machine instantly
sudo poweroff
Part 5: Converting & Deploying Your Clones
Once the VM’s status shows it is completely stopped:
- Right-click VM 9000 in your Proxmox sidebar hierarchy.
- Select Convert to Template.
How to use your pristine template:
- Right-click your new template icon and hit Clone.
- Pick Full Clone. Name it whatever you need (e.g.,
gitlab-serverorprod-runner). - Before turning it on, go to the Hardware tab, select Hard Disk, click Disk Action -> Resize, and expand your disk to your production size (e.g.,
70 GiB). - Click Start.
Your new VM will boot up, seamlessly claim its own individual IP address from your router, automatically apply its Proxmox name as its system hostname, and let you SSH straight into it with your password instantly!